Creating a New Project in SVN
The following steps should be performed on a developer’s workstation having access to the SVN server:
- Start SVN Repository Browser
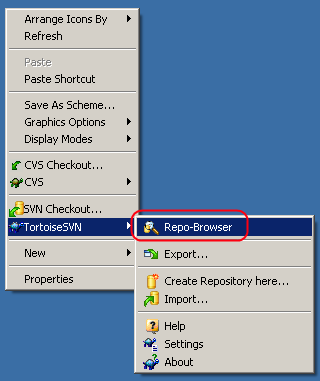
- Point it to your developer server (where a new repository has been created and SVN server has been started):

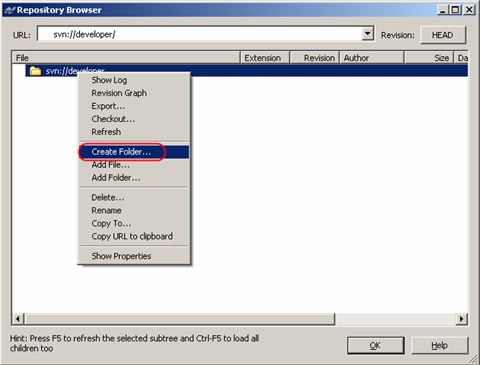
- In the Repository Browser, right-click on the server root and choose ‘Create new folder’:
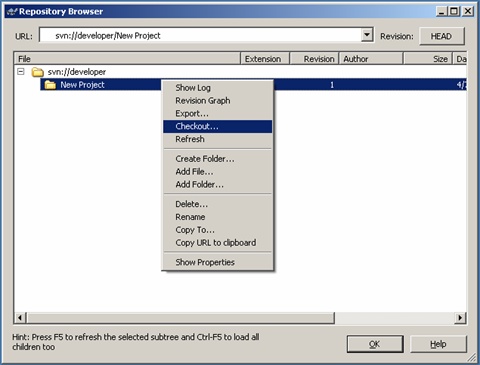
- Checkout the new folder to a local disk
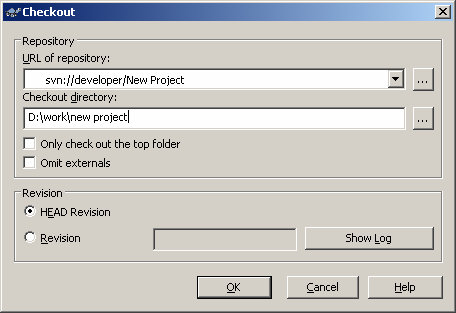
- As a result you should have a working folder (so called ‘sandbox’) on the workstation hard drive
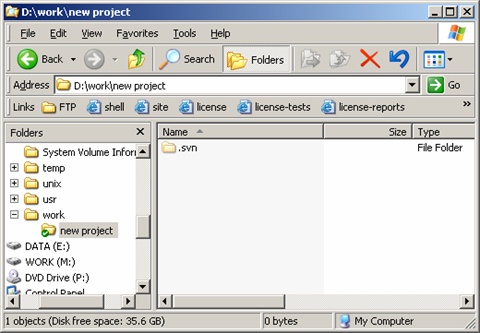
- Now copy the entire Sitecore solution root to the sandbox.
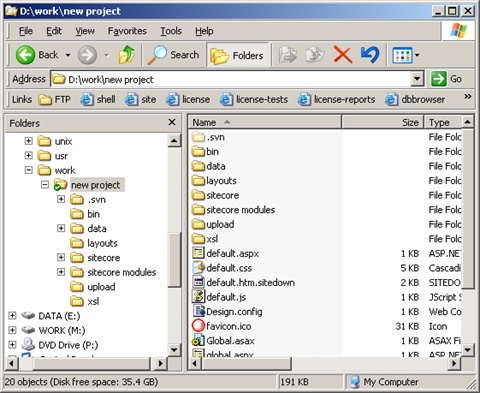
-
Add the files from your solution to SVN. DO NOT ADD PARTS OF SITECORE DISTRIBUTION TO SVN UNLESS YOU WANT TO MAKE AND TRACK MODIFICATIONS TO THEM.
For example there is a custom XSL rendering which needs to be stored in SVN.
Right-click XSL folder and select TortoiseSVN » Add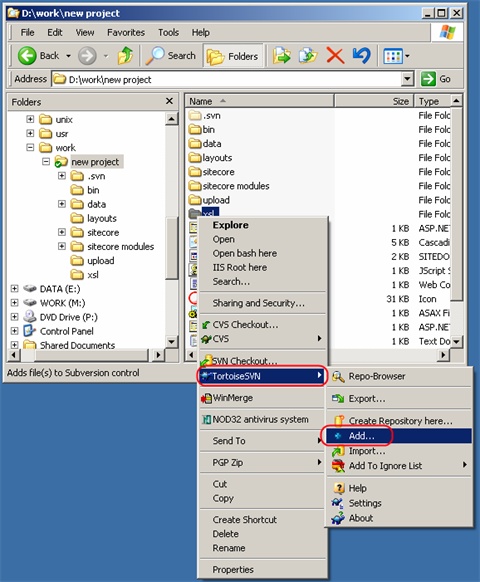
- In the ‘Add’ dialog, uncheck any files which are not supposed to be tracked and click OK:
It is possible to add many files in different parts of the site to SVN in that way.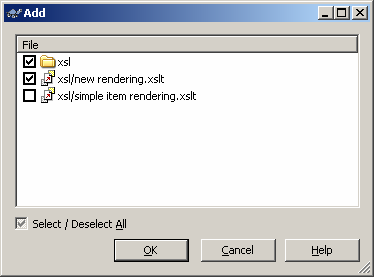
- To commit the changes, right-click on the working folder (site root) and choose SVN Commit:
Note: all modifications are first made in a local working folder (sandbox) and then should be committed to the repository to become available to all developers.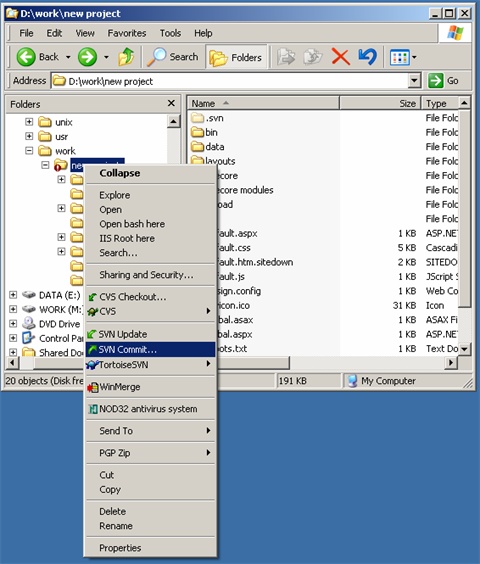
- It is possible to add a revision comment upon commitment which will be stored in the file and project history and will be available later.
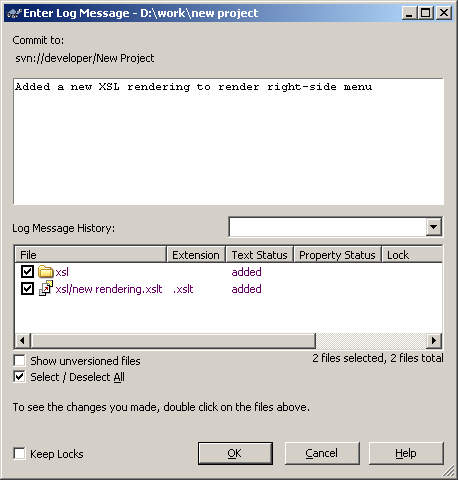
Please note that Tortoise SVN automatically tracks local modifications and marks modified files and directories with special overlay icons.
Tortoise SVN also adds custom columns to the ‘Detailed’ folder view in explorer which show SVN-related information about the item.